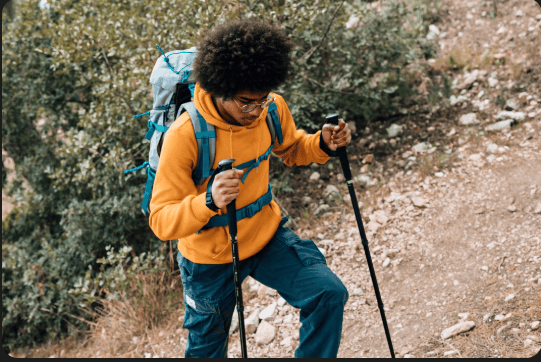
Have you ever finished a long hike with trekking poles and still felt that familiar ache in your knees, or maybe found your shoulders were sore the next day? If so, you’re not alone. I’ve seen countless hikers, even experienced ones, using high-quality gear but setting their hiking pole height incorrectly. The truth is, mastering the right length isn’t a one-time setup; it’s a dynamic skill that changes with every shift in terrain. The correct pole height acts like a suspension system for your body, but if it’s too long or too short, it turns into an awkward liability. So, what’s the secret? The right starting length is determined by the 90-degree elbow rule on flat ground, but your true, ideal length changes constantly, often several times within a single mile, to optimize leverage uphill and save your joints downhill.
The Power of Proper Pole Sizing
Let’s cut right to the chase: your trekking poles are arguably the most effective tool you own for mitigating the physical stress of hiking. But they can only deliver on that promise if they are sized and adjusted perfectly. Most hikers who think their poles “don’t help much” are simply using them wrong, and height is the most critical variable.
When you nail the optimal hiking pole height, several things happen immediately:
- You Save Your Knees: This is the big one. When poles are correctly lengthened for descents, they can absorb up to 25% of the compressive force that would otherwise hammer your knee and ankle joints. This translates to less long-term wear and tear and far less post-hike stiffness.
- You Boost Your Engine: Setting the right length for ascents allows you to push off effectively, engaging your shoulders, back, and core. This shifts some of the workload from your leg muscles to your upper body, turning a leg-heavy slog into a full-body workout and saving your quads for the miles ahead.
- You Maintain Balance: Poles give you four points of contact with the ground, transforming you from a slightly wobbly biped into a confident quadruped. This is invaluable on slippery creek crossings, loose scree, or while navigating a narrow ridge line.
The core problem, as you’ve already guessed, is that your body’s geometry relative to the ground changes constantly. What works on a flat meadow will be completely wrong on a steep climb. This article will show you how to find your universal starting point and then teach you the three expert strategies for adapting your hiking pole height to any slope you encounter.
Finding Your Base Length: The Universal 90-Degree Rule
Before you can tackle a mountain, you need to find your foundational, or “base,” length. This measurement is used for flat trails, gentle rolling terrain, and serves as the anchor point for all your terrain-specific adjustments.
The Golden Standard: The Perfect 90-Degree Angle
The universally accepted standard for finding the correct trekking pole length is simple: when the pole tip is planted on the ground near your foot, your elbow should form a perfect 90-degree angle.
Why 90 degrees? This angle is considered anatomically optimal for two reasons:
- Efficiency: It ensures that your forearm is parallel to the ground, allowing for the most efficient swing and plant motion, establishing a smooth hiking rhythm.
- Power Transfer: It positions your wrist and arm to apply downward pressure efficiently, maximizing the support and stability the pole provides without straining your shoulder or wrist joints.
Step-by-Step Sizing Guide
Don’t just eyeball it. Here’s the precise way to set your base length:
- Gear Up: Put on the hiking boots you plan to wear most often. The sole height matters, so standing barefoot will give you an inaccurate measurement.
- Initial Hold: Take one of your adjustable poles. Stand upright on level ground.
- Establish the Base: Place the pole tip on the ground next to your foot.
- Grip and Angle: Hold the primary grip (not the foam extension below it). Now, look at your elbow. Adjust the pole’s length until your upper arm and forearm form that crisp right angle. Your forearm should look like a shelf, parallel to the ground.
- Lock It In: Secure the locking mechanism (whether it’s a lever lock or a twist lock) firmly. Note this number, typically marked in centimeters (cm), on the pole shaft. This is your personal hiking pole height baseline.
The Math-Based Shortcut
If you are purchasing poles online and can’t physically test them, you can use a quick calculation to estimate your starting length in centimeters. This method is a great shortcut, though it doesn’t account for unique arm-to-torso ratios, so always verify with the 90-degree rule once you have the physical pole.
Height (in cm) x 0.68 = Ideal Pole Length (in cm)
For example, a hiker who is 175 cm tall would look for a base length of 175 x 0.68 ≈ 119cm.
Mastering Terrain-Specific Pole Adjustments (The Expert Method)
The 90-degree base length is necessary, but it’s only the starting point. True efficiency on the trail comes from learning how to dynamically adjust your trekking pole length to match the slope. If you have adjustable poles (and you should!), you must adjust them on the fly. This quick adaptation is what separates casual use from expert technique.
The Uphill Strategy: Shorten to Power Up
When you start climbing, the ground rushes up to meet your pole tip sooner, effectively making your poles too long and forcing you to plant them awkwardly far ahead of you. This compromises your leverage and exhausts your shoulders.
- The Rule: Shorten both poles by 5 to 10 cm (2 to 4 inches) from your base length. For exceptionally steep climbs, you might even drop 15 cm.
- The Adjustment: Shorten the poles as you approach the ascent. If you feel like your poles are hitting the ground too high or your hands are rising above your elbows, shorten them.
- Why It Works: Shortening the pole ensures you can plant the tip closer to your body, allowing you to drive a more vertical and powerful push with your arms. This transfers power directly through your core, assisting your legs and reducing fatigue. Think of it less as a crutch and more as a pair of extra pistons powering your movement.
The Downhill Strategy: Lengthen to Save Your Knees
Descending is where the most significant forces are applied to your joints. If your poles are too short, you’re forced to bend over to plant them, placing your center of gravity too far forward and stressing your lower back.
- The Rule: Lengthen both poles by 5 to 10 cm (2 to 4 inches) from your base length. For very steep, sustained descents, you might need even more length.
- The Adjustment: Lengthen the poles before the descent begins. You should be able to plant the pole comfortably ahead of your body without compromising your posture. Your elbow angle can be less than 90 degrees here; the goal is reach and shock absorption.
- Why It Works: Lengthening the pole allows you to plant it further down the slope and ahead of your body, creating a brace. This extended reach lets the pole absorb the gravitational shock before it reaches your knees and ankles. It improves stability, slows your momentum safely, and gives your knees the break they deserve.
The Traverse Technique (Side-Hilling): The Asymmetrical Secret
When walking across a steep hillside (traversing), the ground is uneven, creating a tricky balancing act.
- The Rule: Use two different lengths. Keep the pole on the uphill side shorter than your base length, and the pole on the downhill side longer than your base length.
- The Adjustment: Adjust one pole at a time, aiming to maintain that near 90-degree elbow angle on both arms relative to the slope. If you can’t stop to adjust, slide the uphill hand down to the pole’s foam grip extension for a quick, temporary fix.
- Why It Works: This is crucial for keeping your body balanced and upright. If both poles were the same length, the uphill pole would be too high and the downhill pole too low, forcing you to lean precariously into the slope. Using asymmetrical lengths keeps your center of gravity stable, minimizing the risk of a slip.
Quick Reference: Hiking Pole Height and Adjustment Chart
To help you visualize your ideal starting length and common adjustments, use this chart as a resource.
| Hiker Height | Base Pole Length (Approx.) | Uphill Adjustment (Shorten) | Downhill Adjustment (Lengthen) |
|---|---|---|---|
| 5’0″ (152 cm) | 105 cm | 95 – 100 cm | 110 – 115 cm |
| 5’5″ (165 cm) | 115 cm | 105 – 110 cm | 120 – 125 cm |
| 5’10” (178 cm) | 120 cm | 110 – 115 cm | 125 – 130 cm |
| 6’2″ (188 cm) | 130 cm | 120 – 125 cm | 135 – 140 cm |
| Principle | 90° Elbow Angle | Allows Vertical Push/Leverage | Increases Reach/Shock Absorption |
| Terrain | Flat or Gentle Undulation | Steep Ascent | Steep Descent |
The Necessity of Adjustable Poles (Commercial Transition)
If the core takeaway from sections two and three is that your ideal hiking pole height is constantly changing, then the natural conclusion is this: fixed-length poles simply cannot deliver the stability and joint protection you need. I consider high-quality adjustable poles to be one of the most critical investments you can make in your long-term hiking health. They are absolutely essential for safely and efficiently navigating varied terrain, which describes almost every trail outside of an indoor track.
Fixed vs. Adjustable: Why Versatility Wins
Fixed-length poles are lightweight and often used by trail runners who know they will be sticking to relatively flat ground, but for backpackers and mountain trekkers, they are a liability. When you buy a fixed pole, you are effectively buying one setting, your base 90-degree length, which will be too long for climbs and dangerously short for steep, mile-long descents. An adjustable pole, whether it’s a two-segment telescopic model or a z-fold pole, gives you the flexibility to adapt your trekking pole length instantly, ensuring you always have the right leverage and reach.
Understanding Locking Systems: The Key to Trust
The security of your adjustable poles hinges entirely on the locking system. A pole collapsing under your weight during a downhill step is not just annoying; it’s a serious stability and injury risk. There are two main types of locking systems you will encounter:
Lever or Flick Locks (External Locks)
- The Expert’s Choice: These are external clamps that snap shut with a lever, similar to a quick-release bicycle axle. They are, without question, the superior choice for reliability and ease of use.
- Pros: They are fast to operate, easy to adjust while wearing gloves, and maintain superior holding power, especially when under heavy stress from downhill braking. This reliability is vital when setting your hiking pole height for maximum load. They are also easy to field-maintain and clean if dirt or mud gets into the mechanism.
Twist Locks (Internal Locks)
- The Lighter Option: Twist locks use an internal expanding mechanism that engages when you twist the shaft sections against each other.
- Pros: They tend to result in a sleeker, sometimes lighter pole design.
- Cons: They require more wrist strength to tighten correctly, and they are notorious for freezing up or slipping in extremely cold or wet conditions. If you choose a twist-lock design, always check them frequently during long days.
Materials and Weight: The Carbon-Aluminum Trade-Off
When you start looking at high-end adjustable poles, you’ll mainly choose between two materials, each impacting the weight and durability of your gear.
| Material | Key Benefit | Trade-Off | Best Use Case |
|---|---|---|---|
| Aluminum | Highly durable; bends rather than snaps; cost-effective. | Heavier; higher swing weight can cause fatigue over long distances. | Beginners, budget-conscious hikers, rugged terrain (where falls are common). |
| Carbon Fiber | Extremely light; dramatically reduces swing weight (less fatigue). | More expensive; prone to snapping (breaking cleanly) under sharp impact or extreme side load. | Ultralight backpackers, long-distance thru-hikers, those prioritizing speed and minimal weight. |
The crucial element to understand here is swing weight. A heavy pole requires more effort to swing forward with every step. Over a ten-mile day, reducing the weight of your poles by even a few ounces translates to saving energy equivalent to walking several extra miles. This subtle fatigue reduction can make a huge difference in your endurance and form.
Expert Recommendations: Top Adjustable Poles for Versatility (Commercial Focus)
As a guide who has relied on adjustable poles for thousands of miles across diverse landscapes, I know what works when your safety and comfort depend on quick and secure adjustments to your hiking pole height. The best poles are those that are easy to adjust, reliable under load, and comfortable in your hand.
Best Overall Adjustable Poles (High Performance & Durability)
These recommendations feature reliable lever-lock systems and are suitable for everything from short day hikes to multi-week backpacking trips.
- Black Diamond Alpine Carbon Cork: This is often considered the gold standard for versatility. It utilizes Black Diamond’s highly reliable FlickLock system for fast, secure length changes, making those dynamic trekking pole length adjustments effortless. The cork grip is a huge plus, molding to your hand over time, wicking away sweat, and offering superior comfort on hot days. It balances the low swing weight of carbon fiber with exceptional all-around durability.
- LEKI Legacy / Makalu Lite: LEKI is renowned for its proprietary Speed Lock system, which is arguably the strongest external locking mechanism on the market. The Legacy series offers a great balance of features at a more moderate price point, usually in aluminum. If you’re tackling very steep, demanding terrain where you need absolute faith in your pole length holding, LEKI is an excellent choice.
Best Ultralight Poles for Fast-Packing (Folding Design)
If shaving every ounce counts, folding (or “z-pole”) models are the best. They collapse quickly and fit easily into small packs, perfect for fast and light trips or trail running where you might only need your poles for steep segments.
- Black Diamond Distance Series (Carbon Z): These poles excel in speed. They typically offer a limited adjustment range (often around 10 to 20 cm) but lock into place incredibly quickly using a small button and internal cord. They are perfect if you primarily need a consistent length but still want that quick collapse feature. Remember to choose a size close to your calculated base hiking pole height since the adjustability is minimal.
- MSR DynaLock Ascent Carbon: MSR provides a nice hybrid, using a folding design with a small section of lever-lock adjustability at the top. This gives you the speed of a z-pole plus the critical 10-15 cm of adjustment needed to switch between uphill and downhill strategies. This is a top-tier choice for the serious backpacker who wants both low weight and dynamic adjustability.
Best Value/Budget Adjustable Poles
You don’t need to break the bank to get a high-performing pole that secures your desired trekking pole length. The most important feature to look for in the budget category is the lever lock.
- Cascade Mountain Tech or REI Co-op Trailmade: Both of these models usually feature reliable external lever locks and durable aluminum construction at a beginner-friendly price. They might be slightly heavier than carbon fiber, but they provide all the necessary security and dynamic length adjustment capability needed to safely learn the expert methods described in Section III. These poles prove that even entry-level gear can provide immense benefits for joint stability and endurance.
Conclusion: Making the Final Investment
If you take only one thing away from this comprehensive guide, let it be this: setting the correct hiking pole height is not an exact science, but a dynamic, on-the-trail skill. Your poles are only useful if they are the correct length for the exact slope you are standing on right now.
Forget the idea of “set it and forget it.” The moment you transition from a flat trail to a steep uphill section, your poles are effectively too long and need to be shortened by five or ten centimeters. The moment you crest that hill and start a taxing descent, they need to be lengthened to extend your reach and protect your knees. This ability to instantly adapt your pole length is what turns a piece of gear from a useful accessory into a non-negotiable part of your stability system.
Making the move to a high-quality, adjustable set of poles, especially those with reliable external lever locks, is perhaps the single greatest investment you can make in your body as a hiker. You’re not just buying two sticks; you’re buying miles of reduced impact, better balance, and stronger endurance.
Before your next big trek, take the time to practice those adjustments. Walk around your neighborhood or a local park, deliberately shortening them for “imaginary climbs” and lengthening them for “imaginary descents.” When you get out on the trail, you will find that those micro-adjustments become second nature.
Don’t wait until your knees start complaining years down the line. Invest in your longevity, trust your poles, and enjoy the confidence that comes with mastering the terrain beneath your feet. Happy trails!