
You’re halfway up a steep trail when you hear it, that telltale scraping sound. Your pole tip catches on a rock instead of gripping it, and you nearly lose your balance. Sound familiar? Whether your carbide tips have worn smooth or your rubber feet are cracked and useless, knowing hiking pole replacement tips can mean the difference between a confident climb and a frustrating (or dangerous) day on the mountain.
The good news is that replacing trekking pole tips is straightforward once you know what to look for. Most hikers need to swap out their tips every 6 to 12 months of regular use, though this varies based on terrain and hiking frequency. In this guide, I’ll walk you through everything you need to keep your poles performing like new, from spotting wear patterns to choosing the right replacements and installing them properly.
Why Your Pole Tips Matter More Than You Think
I’ve seen hikers drop hundreds of dollars on lightweight poles with fancy shock absorption, then ignore their tips until they’re practically ground down to nubs. Here’s the thing: your pole tips are where the rubber (or carbide) literally meets the road. They’re your contact point with the earth, and when they’re worn out, even the best poles become unreliable.
Fresh tips provide proper traction on rocks, dirt, and pavement. They protect the environment by preventing your pole shafts from scarring trees and vegetation. And perhaps most importantly, they keep you stable when you need it most, during steep descents, river crossings, or when you’re carrying a heavy pack.
According to the American Hiking Society, proper use of trekking poles can reduce the impact on your knees by up to 25% during descents. But that protection disappears when your tips can’t grip properly. Let’s make sure yours are up to the task.
Reading the Warning Signs: When Your Tips Are Telling You Something
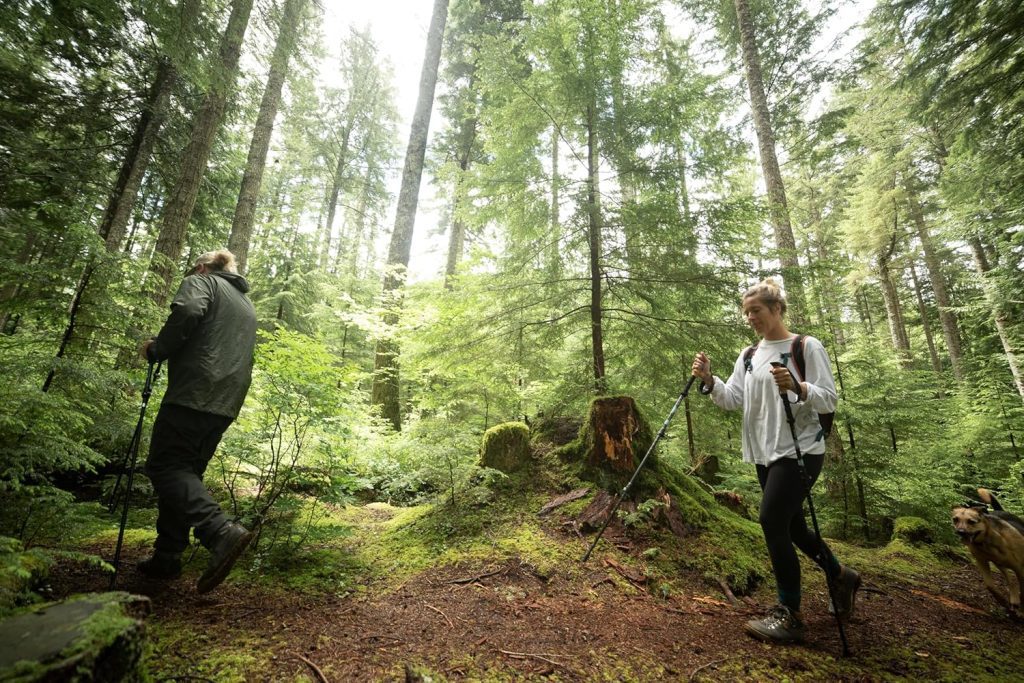
Your hiking poles talk to you. You just need to learn their language.
The Carbide Truth
Carbide tips are tough, they’re designed to bite into rock and hard-packed dirt. But nothing lasts forever. Run your finger over the tip (carefully). Does it feel rounded and smooth instead of sharp and defined? That’s your first clue.
Watch how your poles behave on solid surfaces. If they’re skating across rocks instead of catching, the carbide has worn down. You might also notice a shiny, polished look to the metal where it used to be matte and textured. Some hikers report hearing a different sound, more of a click than a solid tap, when the tips make contact with stone.
I had a client last season who insisted her tips were fine. Then we looked at them under good light, and you could see the wear pattern had created an asymmetrical edge. She was essentially hiking with one good pole and one that wanted to slip sideways. Not ideal when you’re navigating scree fields.
Rubber Reality Check
Rubber tips are easier to diagnose. Hold them up and look for the obvious stuff: cracks running through the material, chunks missing from the tread, or a hardened texture that feels more like plastic than grippy rubber.
Try the flex test. Fresh rubber tips have some give when you press them. Old ones feel stiff and brittle. If your rubber tips have been sitting in a hot garage all summer or frozen in your car trunk all winter, they’ve probably degraded faster than you’d think.
The tread pattern matters too. Those little grooves and nubs aren’t just decoration, they channel water and provide grip. When they’ve worn flat, your tips have lost most of their effectiveness on smooth surfaces like pavement or wet rock.
Basket Breakdown
People forget about baskets until they’re dangling by a thread. Check where the basket attaches to your pole. Any cracks radiating from those attachment points? That’s a failure waiting to happen, probably at the worst possible moment.
The edges of snow baskets take a beating from rocks and roots. If you see chunks missing or the whole thing looking warped and bent, it’s time for a replacement. A broken basket in powder snow means your pole punches straight through to nothing, not exactly helpful when you’re trying to maintain your balance.
Understanding Your Options: A Guide to Replacement Tips
Walk into any outdoor store and you’ll face a wall of trekking pole accessories. Let’s break down what actually matters.
Carbide Tips for the Rocky Road
These metal tips are the workhorses of the hiking world. They’re made from tungsten carbide, one of the hardest materials around, which is why they last longer than other options on rough terrain.
Standard carbide tips work great for most conditions, dirt trails, rocky paths, mixed terrain. You’ll see them in different profiles. Some are sharply pointed for maximum bite on rock. Others have a slightly rounded profile that transitions better between surfaces.
The angled carbide tip is worth understanding. Instead of pointing straight down, it’s cut at an angle that matches your natural walking motion. This gives you better contact with the ground throughout your stride. Many experienced hikers swear by them, though honestly, I’ve found the difference most noticeable on long days when you’re covering serious mileage.
Quality varies more than you’d expect. Budget carbide tips might use softer metal alloys that wear faster. Premium options typically last twice as long, making them cheaper in the long run. A good carbide tip from a reputable manufacturer should give you 150 to 300 miles of rocky trail hiking.
Rubber Tips for Gentler Ground
Rubber tips serve a different purpose. They’re your go-to for pavement walking, indoor use (yes, some people use poles in gyms and physical therapy), and any situation where you need quiet operation and good grip without damaging surfaces.
The rubber tip market has gotten surprisingly sophisticated. You’ll find options with aggressive tread patterns for wet conditions, firmer compounds for durability, and softer formulations for maximum grip. Some have reinforced cores that resist wearing through, while others prioritize flexibility.
I use rubber tips for parking lot approaches and town walking between trailheads. They protect your carbide from unnecessary wear on pavement, and they don’t make that annoying clicking sound that echoes through a quiet neighborhood at dawn.
One underrated benefit: rubber tips are much kinder to wooden boardwalks and bridges on trails. Park services appreciate hikers who use them in these areas.
The Basket Situation
Baskets aren’t just for winter. Yes, snow baskets are essential for winter hiking, they keep your poles from sinking into powder. But trekking baskets (the smaller ones) actually help year-round by preventing your poles from wedging into gaps between rocks or getting stuck in mud.
Snow baskets typically measure 3 to 5 inches across. They’re almost mandatory for snowshoeing or winter backpacking. Without them, you’re constantly pulling your poles out of deep holes in the snow, which gets old fast.
Smaller trekking baskets (1.5 to 3 inches) strike a balance. They provide some floatation without catching on vegetation or feeling cumbersome. Mud baskets fall somewhere in between, designed for boggy conditions where you need more surface area than a trekking basket but less bulk than a snow basket.
Here’s what most people don’t know: baskets are often interchangeable between seasons. You can pop off your trekking baskets and swap on snow baskets when winter arrives, as long as they’re compatible with your pole system.
Suggested read: 7 Best Lightweight Backpacking Tents for Couples
Making the Right Choice: Matching Tips to Your Needs
Buying replacement tips shouldn’t be complicated, but there are a few details that matter.
The Diameter Dilemma
This is crucial: hiking pole shafts come in different diameters, typically 12mm, 14mm, or 16mm. The wrong size tip won’t fit properly, period. Some poles use even less common sizes.
Measuring is simple. Use a caliper if you have one (most outdoor shops do), or check your pole manufacturer’s specifications online. Some tips are labeled as “universal,” which usually means they fit the most common 14mm size with adapters for others.
When in doubt, bring your pole to the store. Better to confirm the fit than order online and end up with tips you can’t use.
Terrain Drives Decisions
Think about where you actually hike, not where you wish you hiked. If you’re honest about spending 80% of your time on established dirt trails with occasional rocky sections, carbide tips are your friend. Save the specialized options for situations you encounter regularly.
Rocky, mountainous terrain? Standard or angled carbide tips. Pavement and easy trails? Rubber tips. Winter conditions? Carbide tips with snow baskets. Mixed conditions? Keep both carbide and rubber tips in your kit.
The hikers I see struggling most are the ones who bought tips for their dream hikes instead of their real hikes. Someone who mostly walks rail trails doesn’t need aggressive alpine tips.
Brand Loyalty vs. Universal Fit
Major manufacturers like Black Diamond, Leki, and REI make brand-specific tips designed for their poles. These usually fit perfectly and work exactly as intended. The downside? They’re often more expensive and sometimes harder to find.
Universal or aftermarket tips cost less and work with multiple brands. Quality varies significantly here. Some universal tips fit snugly and perform great. Others wobble or fall off at inopportune moments.
My take: if you have popular poles from a major brand and can easily find OEM (original equipment manufacturer) tips, stick with those. If you’re on a budget or have older poles, quality universal tips from companies like Outdoor Designs or Cascade Mountain Tech work fine.
Building Your Arsenal
Serious hikers keep multiple tip sets. It’s not extravagant, it’s practical. A basic setup includes:
- Primary carbide tips for trail use
- Rubber tips for pavement and town
- Spare carbide tips in your emergency kit
- Seasonal baskets if you hike year-round
This might run you $40 to $60 total, which is a small fraction of what you paid for the poles themselves.
Interesting read: 7 Best Trekking Poles for Rocky Terrain
The Replacement Process: Step by Step
Changing tips isn’t rocket science, but doing it right ensures they stay put when you need them.
Getting the Old Tips Off
Sometimes old tips slide right off. More often, they’re stuck from dirt, corrosion, or just compression from thousands of impacts.
Start gentle. Grip the tip with your hand and twist while pulling. If that doesn’t work, try rubber gloves or a piece of cloth for better grip. Still stuck? Now we get creative.
Heat helps. Run hot water over the tip for a minute or two. The metal pole shaft and the tip material expand at different rates, often breaking the seal. Some people use a hair dryer for the same effect.
For really stubborn tips, carefully use slip-joint pliers. Wrap the pole shaft with a cloth to prevent scratching, then grip the tip with the pliers and twist. Apply steady pressure rather than jerking, you want to break the bond, not damage the threads on your pole.
Penetrating oil (like WD-40) can work overnight for severely stuck tips. Spray it around the connection point, let it sit, then try the removal process again.
Once the tip is off, clean the pole shaft. Use a small brush or cloth to remove any debris, old adhesive, or corrosion. This ensures your new tip seats properly.
Installing Fresh Tips
Take your new tip and check the interior for any manufacturing residue or debris. Make sure it’s clean and ready to go.
Align the tip with the pole shaft. Most tips have a specific orientation, look for any markings or asymmetrical features. Push the tip onto the pole shaft firmly. You should feel it seat solidly.
Here’s where people ask about adhesive. For most hiking situations, you don’t need glue. A properly fitted tip stays on through friction alone. However, if you’re doing extreme hiking, lots of side-loading on steep terrain, boulder scrambling, or extended backcountry trips, a small amount of flexible adhesive adds security.
If you do use adhesive, less is more. A tiny dab of flexible glue (not super glue, which is too brittle) around the shaft before installing the tip is plenty. You still want to be able to remove the tip eventually for maintenance or replacement.
Baskets and Threading
Many modern poles use a screw-on basket system. Thread the basket onto the pole, turning clockwise until it’s snug. Don’t overtighten, you’ll strip the threads or crack the basket.
Some systems use a clip or snap mechanism. These should click into place audibly. If your basket wobbles after installation, something’s not right. Remove it and try again.
The Crucial Test
Before you head out, test your new tips. Press down hard on various surfaces around your house or yard. The tips should stay firmly attached with no wiggling or movement. Walk around with your poles. Listen and feel for anything unusual.
Take them on a short, easy hike before committing to a long trek. Better to discover a problem two miles from your car than fifteen miles into the backcountry.
Pro Maintenance: Making Your Tips Last
Smart maintenance extends the life of every set of tips you buy.
Start every hike with a quick check. Wiggle your tips, are they secure? Look at the wear patterns. This 30-second habit catches problems before they become issues on the trail.
After muddy or sandy hikes, rinse your tips. Grit acts like sandpaper, accelerating wear. Let everything dry completely before storing your poles. Moisture trapped under tips promotes corrosion on the pole shaft.
Store your poles in a climate-controlled space when possible. Extreme temperature swings, leaving them in a hot car or frozen garage, degrade rubber tips and can affect the fit of carbide tips over time.
Here’s a strategy that works: rotate your tips based on terrain. Use your older, slightly worn carbide tips on moderate trails. Save your fresh tips for technical terrain where grip matters most. This spreads wear across multiple sets and reduces your overall replacement frequency.
Carry spare tips on multi-day trips. Pack a basic carbide tip in your repair kit. Tips weigh almost nothing but losing one in the backcountry significantly reduces your pole’s usefulness.
Create a seasonal maintenance routine. Before winter, inspect and replace anything questionable. After winter, clean thoroughly and assess what needs replacing before summer hiking season. Spring and fall are good times to stock up on tips during outdoor retailer sales.
Common Mistakes That Cost You
I’ve made most of these mistakes myself, which is how I learned what not to do.
The biggest error is using worn tips too long. We tell ourselves “just one more hike” until we’re basically hiking with metal stubs. Worn tips don’t just reduce performance, they’re a legitimate safety issue. Poor grip means more slips, which means more falls, which means potential injuries.
Using the wrong tip for your terrain is surprisingly common. I see people clicking carbide tips across miles of pavement, wearing them down unnecessarily. Others try hiking rocky mountains with rubber tips meant for road walking. Match your tips to your environment.
Forcing installation damages both tips and poles. If a tip doesn’t fit easily, something’s wrong, wrong size, debris in the way, or defective parts. Forcing it can crack tips, strip threads, or bend pole shafts.
Ignoring basket wear leads to failures at bad moments. A basket that looks “mostly okay” can snap completely when you need it most in deep snow or mud.
Assuming all tips are interchangeable is false. Brand compatibility matters more than many hikers realize. That super cheap set of tips might not fit quite right, leading to them falling off mid-hike.
Forgetting to pack tips when traveling causes problems. If you’re flying to a hiking destination, TSA rules may require you to remove tips (especially sharp carbide ones). Pack spares in your checked bag so you’re not searching for specific tips in an unfamiliar town.
Where to Buy and What to Expect

Finding replacement tips is easier than it used to be, but knowing where to look saves time and money.
Online Shopping
REI’s website carries most major brands and has detailed compatibility information. Their return policy is excellent if you accidentally order the wrong size.
Amazon has the broadest selection and often the lowest prices. However, quality control can be inconsistent with third-party sellers. Stick to products sold directly by major brands or Amazon itself.
Manufacturer websites (Black Diamond, Leki, Komperdell) guarantee compatibility and authenticity. Prices are usually retail, but you know you’re getting the real thing.
Specialty online retailers like Backcountry and Moosejaw run frequent sales. Sign up for email lists to catch deals, I’ve seen 20-30% discounts on tips during off-season sales.
Local Options
Local outdoor retailers offer the advantage of hands-on help. Bring your poles in, and staff can measure, recommend, and confirm fit before you buy. You’re paying a bit more than online, but you’re supporting local business and getting expert advice.
Some sporting goods chains like Dick’s Sporting Goods or REI co-ops stock basic replacement tips. Selection is usually limited to common types and sizes.
Price Ranges and Value
Budget tips ($5 to $10): Basic functionality, shorter lifespan. Fine for occasional hikers or backup sets.
Mid-range tips ($10 to $20): Good quality from reputable brands. Best value for most hikers who use their poles regularly.
Premium tips ($20 to $30+): Specialized designs, maximum durability. Worth it if you’re hard on gear or hiking professionally.
Buying multiple pairs at once often saves money. Many retailers discount packs of 2 or 4 tips. Since you’ll eventually need them anyway, stocking up makes financial sense.
Warranty Considerations
Many pole manufacturers warranty their tips for defects. This rarely covers normal wear, but if a tip breaks prematurely or has a manufacturing flaw, you might get free replacements. Keep your purchase receipts and register products when possible.
Replacement Frequency Reference Guide
Not sure how often you should replace different components? Here’s a practical reference table based on real-world usage patterns:
| Component Type | Light Use (< 50 miles/year) | Moderate Use (50-150 miles/year) | Heavy Use (150+ miles/year) | Terrain Factor |
|---|---|---|---|---|
| Carbide Tips (Rocky/Technical) | 18-24 months | 8-12 months | 4-6 months | High wear |
| Carbide Tips (Dirt/Mixed Trails) | 24-36 months | 12-18 months | 6-10 months | Moderate wear |
| Rubber Tips (Pavement/Casual) | 12-18 months | 6-10 months | 3-6 months | Highest wear |
| Rubber Tips (Indoor/Gym) | 24+ months | 12-18 months | 8-12 months | Low wear |
| Trekking Baskets | 24-36 months | 12-18 months | 8-12 months | Low-moderate wear |
| Snow Baskets | 36-48 months | 18-24 months | 12-18 months | Low wear (seasonal) |
| Mud Baskets | 18-24 months | 10-14 months | 6-10 months | High wear |
Usage Notes:
- Inspect all components before each hiking season regardless of age
- Replace immediately if safety concerns exist (deep cracks, sharp wear, instability)
- Hikers over 200 lbs may experience 20-30% faster wear
- Mixed terrain reduces lifespan by approximately 25%
- Winter storage in temperature-controlled spaces extends rubber tip life by 30-40%
This table gives you a baseline, but your mileage literally varies. Keep a hiking log and note when you replace tips. After a couple of cycles, you’ll know your personal replacement schedule.
Your Most Common Questions Answered
How often should I replace hiking pole tips?
There’s no one-size-fits-all answer, but most regular hikers replace carbide tips once or twice per season. If you’re hiking every weekend on varied terrain, check your tips every couple of months. The wear pattern tells you more than any timeline can.
Can I mix and match tips from different brands?
Sometimes yes, sometimes no. Universal tips are designed to fit multiple brands, but quality varies. Your best bet is measuring your pole diameter and matching it to the tip specifications. When in doubt, stick with the same brand as your poles.
Are expensive tips really worth the extra money?
For occasional hikers, budget tips work fine. But if you’re logging serious miles, premium tips absolutely pay for themselves. They last longer, perform better, and fail less often. I’ve seen $8 tips last two hikes and $25 tips go two seasons. Do the math.
What’s the most durable tip material?
Tungsten carbide wins for hard surfaces, but durability depends on how you use your poles. The best tip is the one that matches your terrain. Using carbide on rocks? Incredibly durable. Using carbide on pavement? You’ll grind through it surprisingly fast.
Can I repair tips instead of replacing them?
Generally no. Once the carbide wears down or rubber cracks, there’s no effective repair. Some people try sharpening carbide tips with files, but this typically creates uneven surfaces that perform poorly. Tips are consumables, factor replacement costs into your hiking budget.
Should I carry spare tips on backpacking trips?
For day hikes, probably not necessary unless you know your tips are marginal. For multi-day trips, absolutely pack a spare carbide tip. They weigh under an ounce and can save your trip if you lose or damage a tip miles from anywhere.
Final Thoughts: Keep Those Poles Working for You
Here’s what I want you to take away from all this: your hiking poles are only as good as their tips allow them to be. The fanciest, lightest, most expensive poles in the world become unreliable dead weight when their tips wear out.
The good news? Maintaining fresh tips is cheap, easy, and takes minimal time. Check them regularly. Replace them before they’re completely shot. Keep the right types on hand for your typical terrain.
Think of replacement tips like new tires on your car. You wouldn’t drive cross-country on bald tires, and you shouldn’t hit challenging trails with worn-out pole tips. Both situations compromise safety and performance in ways that aren’t worth the risk.
Take fifteen minutes this week to inspect your current tips. Are they showing any of the wear patterns we discussed? If so, order replacements now rather than waiting until you’re planning your next hike. Future you, standing confidently on a rocky slope with poles that actually grip, will appreciate the preparation.
And remember, every expert hiker you see out there has learned these lessons, usually the hard way. None of us started knowing when to replace tips or how to choose the right ones. You’re already ahead of the game just by reading this guide. Now get out there and enjoy the trails with poles that work the way they should.
If you enjoyed reading this article, explore 8 Best Hammock Sleeping Systems for Hikers