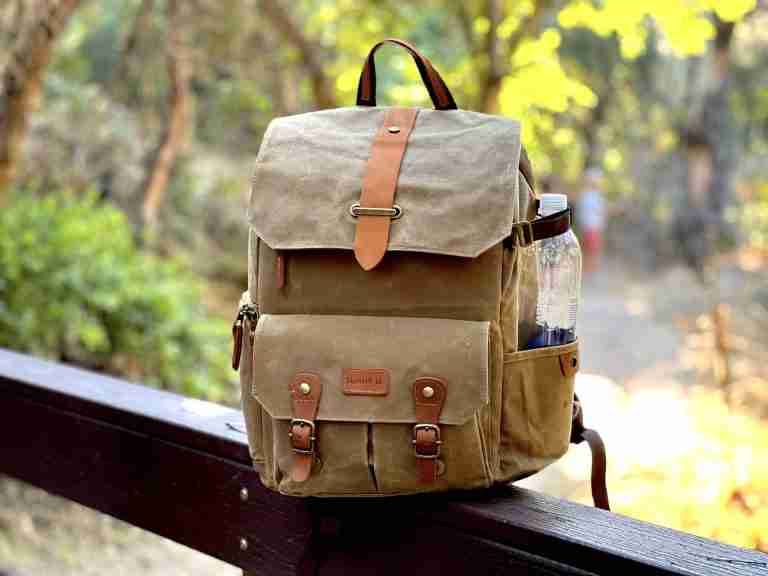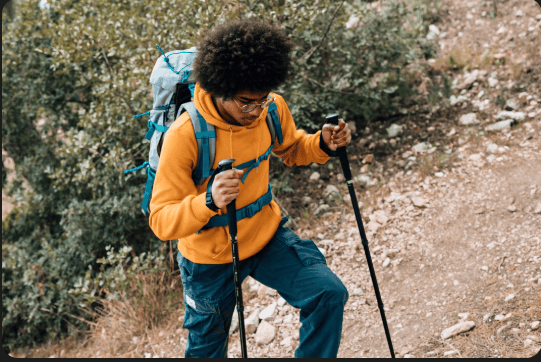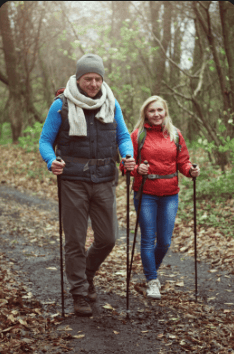

Have you ever been two miles into a beautiful trail, only to have a nagging voice in your head, and a stabbing pain in your lower back, remind you that your backpack feels less like a supportive companion and more like a poorly balanced sack of bricks? We’ve all been there. The secret to fixing this isn’t just buying a lighter pack; it’s mastering the art of how to pack a hiking backpack correctly. The most effective method is the 3 Zone System, which dictates that you place heavy, dense items closest to your core for stability, while ensuring you can easily access your essentials without dumping your gear onto the forest floor. Getting this right is the difference between an enjoyable, miles long trek and a painful slog.
The truth is, an incorrectly loaded pack can feel significantly heavier than its actual weight. It throws off your center of gravity, forces you into an awkward posture, and turns a simple hike into an exhausting battle against your gear. If you’re ready to stop fighting your backpack and start enjoying the trail, you’re in the right place. As a friendly hiking guide and long time enthusiast, I’m going to walk you through the precise techniques that expedition pros use. Let’s make your next trip easier on your body, smarter on the trail, and frankly, a lot more fun.
The Foundation: The 3 Zone Packing System
Every seasoned hiker knows that packing is less about stuffing and more about strategic weight distribution. The goal is to move the pack’s center of gravity as close to your body’s center of gravity as possible. This minimizes strain and helps you maintain balance, particularly when navigating tricky terrain like steep climbs or creek crossings.
We break the main compartment of your hiking backpack into three distinct zones, The Bottom, The Core, and The Top. Master this technique, and you’ll instantly feel like your pack is working with you, not against you.
A. Zone 1: The Bottom (The Sleep Zone) – Heavy But Unneeded
This zone is all about setting a stable, cushioned foundation for the rest of your backpack load. Think of it as the basement of your hiking pack. It holds the bulky items you won’t need until you actually set up camp, allowing them to provide a layer of support without interfering with your hiking rhythm.
What Goes Here:
- The Sleeping Bag: This is almost always the first item in the bag. Why? Because a properly compressed sleeping bag is bulky but relatively light, and it settles beautifully into the bottom curve of the pack, creating a soft cushion against your lower back. Always use a quality compression sack to reduce its volume dramatically.
- Camp Clothes: Your clean, dry clothes for sleeping or camp downtime should be tucked down here. Use a stuff sack for organization, and shove the clothes around the sleeping bag to fill any air gaps.
- Sleeping Pad (If Internal): A compressible sleeping pad can also join the bag down here, though many hikers prefer to strap foam pads externally.
- Camp Shoes/Light Gear: Lightweight, flexible items like flip flops or camp booties can also be stuffed into the gaps here.
The Expert Rationale:
By putting lighter, bulkier items on the bottom, we ensure that the weight we rely on most often doesn’t settle too low, which can cause the pack to pull backward, a phenomenon known as “pendulum effect.” This technique keeps the bulk low for stability while reserving the “sweet spot” (Zone 2) for the truly heavy gear.
B. Zone 2: The Core/Middle (The Heavy Weight Zone) – Center of Gravity
This is the most critical area for proper weight distribution. When you’re packing your bag for a long hike, you need to ensure that the densest, heaviest items are placed directly against your back and sit between your shoulder blades. This is the center of gravity placement, and it ensures the weight is transferred directly down to your hips (which is where most of the pack’s weight should ultimately rest).
What Goes Here:
- Food Cache: This includes packaged meals and dense items like oats or dry goods. Since a full food bag is often one of the heaviest components, it must ride close to your spine.
- Water Reservoir/Bladder: While many modern packs have a dedicated sleeve, the bulk of your water weight must be kept centered. If your reservoir is full, its weight needs to be carefully managed in this zone.
- Stove and Fuel: Your camping stove and the sealed fuel canister (always sealed!) should be nested amongst the food. These are heavy and non compressible, making them perfect for stabilizing the core load.
- Tent Body/Tarp: If your tent poles and fly are attached externally, the heavier tent body or tarp shelter can be wrapped around the central column of food and fuel to keep everything snug.
The Expert Rationale:
If heavy items are placed too far away from your back, even if they are in the center, the pack will pull you backwards, forcing you to lean forward to compensate. This strains your shoulders and lower back. By strategically placing the weight here, it acts like a counterbalance, keeping you upright and agile on the trail. Always ensure this section is packed tightly to prevent shifting. Shifting weight is what causes instability and discomfort!
C. Zone 3: The Top (The Quick Access Zone) – Needed Often
Once your foundation (Zone 1) and your core (Zone 2) are built, the top of the main compartment is reserved for items you will need throughout the day or in an unexpected emergency. The goal here is immediate accessibility. Think about what you would grab during a sudden thunderstorm or a break for coffee.
What Goes Here:
- Rain Gear: Your rain jacket, rain pants, and pack cover must be the absolute last items loaded. You don’t want to dig through your sleeping bag just because a cloud decided to burst.
- First Aid Kit: No matter the length of your trip, your first aid kit is essential trail safety gear and needs to be grabbed instantly.
- Water Filter/Purifier: If you rely on natural water sources, your filter is a top tier item.
- Headlamp: Even if you start hiking early, you never know when you might need to check a map or hike a bit later than planned. Keep the headlamp handy.
- Layers: Mid layers, fleece jackets, or lightweight thermal tops that you might shed or add during temperature swings.
The Expert Rationale:
Placing essential items on top allows for smooth transitions on the trail. You can quickly react to weather changes or minor emergencies without disrupting the perfectly balanced load below. This is where efficiency meets safety.
Exterior Packing: The Pockets and Attachments
While the 3 Zone System addresses the heavy gear in the main body, the exterior pockets and loops are your secret weapons for organization and maintaining momentum.
- Pockets are for immediate, grab and go items.
- Compression straps and loops are for bulky, sometimes awkward gear that doesn’t fit well internally.
| Exterior Feature | Primary Purpose | Examples of Contents |
| Brain/Lid Pocket | Navigational & Small Essentials | Map, Compass, GPS Device, Sunglasses, Sunscreen, Bug Spray, Wallet/Keys |
| Hip Belt Pockets | Immediate Trail Access (No Stopping) | Quick Snacks (Energy bars, gels), Phone/Small Camera, Lip Balm, Multi Tool, Headphone Case |
| Side Water Pockets | Hydration & Quick Equipment | Water Bottles (Insulated or standard), Tent Poles (Slipped under the compression strap), Fuel Bottles (If necessary) |
| External Loops/Straps | Bulky, Non compressible Items | Trekking Poles, Ice Axe/Crampons (for alpine), Closed Cell Foam Sleeping Pad, Modular Tent Fly/Shelter |
Pre-Packing Checklist and Pro Tips
Once you understand the zones, you need to talk strategy. The actual moment you start putting things in your backpack load is preceded by a critical step: organization. Many novice hikers rush this part, but a few minutes spent organizing before you pack saves hours of frustration on the trail.
A. Organization is Your Best Friend
Before anything goes into your main hiking backpack, lay it all out. Seriously, take a photo. This visual confirmation helps you identify duplicates and, more importantly, helps you categorize.
- The Power of Stuff Sacks: Do not just throw loose clothing into the pack. Invest in a set of lightweight stuff sacks, or even better, lightweight dry bags. Use a distinct color for different categories (e.g., blue for kitchen, green for clothing, red for first aid). This simple method makes it incredibly easy to grab the right sack in the dark or when you’re tired.
- Segment Your Food: Separate your snacks (Zone 3/Hip Pockets) from your dinner/breakfast cache (Zone 2). Consider repackaging bulk food items (rice, oats, pasta) from their heavy commercial packaging into simple, labeled zip top bags. This saves weight and volume immediately.
- The 25% Rule: This is a classic expert strategy. Lay out everything you think you need for your trip. Now, look at it and honestly ask yourself: “What are the unnecessary luxuries?” I guarantee you can pack away at least 25% of that pile. A lighter pack is always better than a marginally more comfortable camp setup.
B. Weight Distribution Mastery
You’ve followed the 3 Zone System, but how do you know if you did it right? There are two simple tests once the pack is loaded.
- The Shake Test: Lift your fully loaded hiking pack off the floor and give it a firm, but gentle, shake from side to side. Does everything rattle, shift, or slosh? If so, your Zone 2 (heavy core) is too loose. Take the top items out and repack the core tighter. Shifting weight constantly throws off your balance and causes fatigue.
- The Shoulder Test: Put the pack on, but do not buckle the hip belt yet. Tighten the shoulder straps. Does the pack feel like it’s pulling you backward? If yes, your heavy gear is too far away from your back. Now, buckle the hip belt and tighten it snugly over your iliac crest (the highest part of your hip bone). Release the shoulder straps slightly. The majority of the pack’s weight, ideally 60% to 80%, should immediately transfer and rest comfortably on your hips. If your shoulders still feel the burden, your pack fit or weight distribution is still off.
C. Moisture Management: Guarding Against the Elements
A wet sleeping bag is a trip killer. While many quality backpacks are made from water resistant material and come with a rain cover, a rain cover is a secondary defense.
- The Liner Method: The gold standard in moisture protection is using a cheap, large, heavy duty trash compactor bag to line the inside of your main pack compartment. Everything goes inside this bag. Seal the top by twisting the liner bag shut before closing the main pack lid. This creates a completely waterproof barrier around your critical gear.
- External Covers: Use the included or purchased pack cover for your external defense. This protects the outer material from saturation and keeps your exterior pockets mostly dry. But remember, a rain cover can only do so much in a sustained downpour; the internal liner is the true savior.
Final Adjustments: Making the Pack Fit You
You’ve figured out how to pack a hiking backpack, now you need to make the pack fit your body perfectly. A properly adjusted pack makes a heavy pack feel light; a poorly adjusted one makes a light pack feel heavy.
A. The Five Key Straps
There are five primary strap types you need to master. Adjust them in this specific order:
- Hip Belt: This is the foundation. It must be cinched snugly over the top of your hip bones (the iliac crest). This transfers the majority of the backpack load from your shoulders to your much stronger leg and core muscles.
- Shoulder Straps: These primarily prevent the pack from falling away from your body. Tighten them just enough to pull the pack close to your back, but not so tight that they compress your shoulders or collarbone.
- Load Lifters: These smaller straps are located on top of the shoulder straps, attaching the pack to the harness. Pull them forward (at about a 45° angle) to gently pull the top of the pack in toward your body. This controls sway and brings the core weight closer to your center of gravity.
- Sternum Strap (Chest Strap): Buckle this across your chest (usually about two inches below your collarbone). It keeps the shoulder straps from slipping off and allows your arms to move freely without rubbing. It should not be overly tight.
- Compression Straps (External): These are on the sides and bottom of the pack. Their job is not to hold extra gear, but to cinch down the contents, preventing internal movement and reducing the pack’s overall volume. Cinch them down tight to eliminate any slack.
B. The Hydration Strategy
Water is heavy, about 2.2 pounds per liter (1 kg per 1 L). How you carry it significantly impacts your hike.
- Internal Bladder: If using a hydration reservoir, fill it and place it in its sleeve (often behind Zone 2) before loading the rest of your gear. If you wait until the pack is full, it’s a difficult squeeze and can pull your heavy core away from your back.
- External Bottles: Carrying bottles in the side pockets is great for quick sipping, but be mindful of balance. If you are only carrying one bottle, place it on the side opposite your trekking poles to help balance the load.
Customized Packing Data Sheet
To make this information even more useful, here is a handy breakdown of where common items should go, offering a quick reference guide that can be cited or referenced before your next outdoor adventure.
| Zone | Priority & Location | Typical Item Weight | Examples of Contents |
| Zone 1: Bottom | Stability & Cushion (Out of Reach) | Light to Medium Bulk | Sleeping Bag, Camp Clothes, Internal Sleeping Pad |
| Zone 2: Core | Center of Gravity (Against Spine) | Heavy & Dense | Food Cache, Stove/Fuel, Water Reservoir (Full), Tent Body |
| Zone 3: Top | Quick Access (Main Compartment) | Medium Density | Rain Gear, First Aid Kit, Water Filter, Headlamp |
| Exterior (Lid/Hip Belt) | Immediate Access (Handy Gear) | Light & Small | Snacks, Map/Compass, Sunscreen, Phone/Camera |
Table: Optimized Weight Distribution for Packing a Hiking Backpack
Final Thought: Hit the Trail, Happy and Balanced
The process of learning how to pack a hiking backpack might seem overly complex right now, but I promise, after just one trip using the 3 Zone System, it will become second nature. You’ll stop looking at your gear as a pile of items and start seeing it as an organized system designed for efficiency.
The real reward isn’t just the neatness of your pack; it’s the feeling five hours into your hike when your shoulders aren’t screaming, and your posture is relaxed. When your pack feels like an extension of your body, not a burden, you can finally stop thinking about the load on your back and start fully enjoying the stunning trail ahead of you. Now go ahead, pack it up, throw on those hip belt straps, and hit the trail with confidence. Happy hiking!